How to Create Chat Group on imo
imo is a messaging service platform that is also used for audio and video calls. The imo application also provides a feature for creating group chats. This allows imo users to hold a conversation between more than 2 people.
As this happens, the chats on imo are not limited to one on one conversations. To create a group chat on this platform, one has to simply follow few basic steps.
In this article we will explain these steps and provide you with a quick tutorial for how to create chat group on imo.
Create Chat Group In Imo
Step to Create Chat Group on imo
Step 1- open imo app: As the first step in the process, you need to open the imo app that you have installed on your mobile phone. To do this you will have to scroll through the list of all the installed apps on your phone.
Once you have spotted the icon for the imo application. It will be a white square with imo written on it within a speech bubble. Tap on it once. 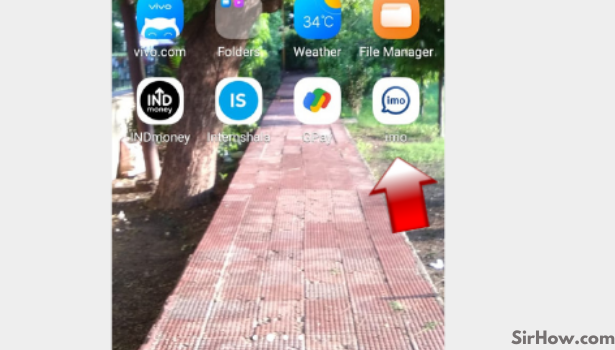
Step 2- Tap on the contact list: The list of chats shows on the first page that comes on your screen after you open the program.
An icon of a grey-colored human portrait may be found in the upper right corner of this page. In imo, this is the contact symbol. Once, tap on it. 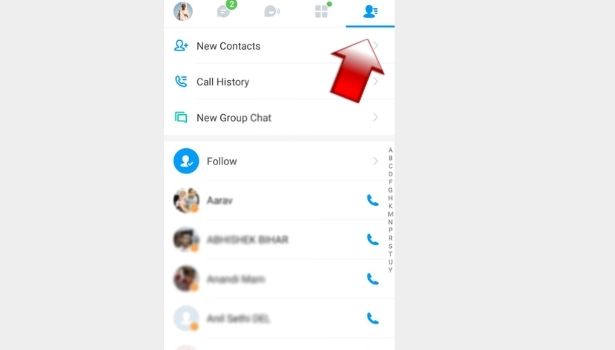
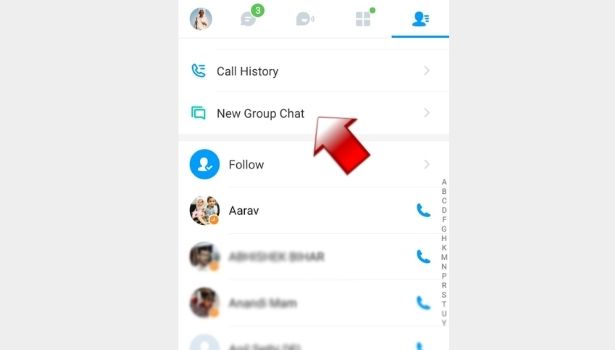
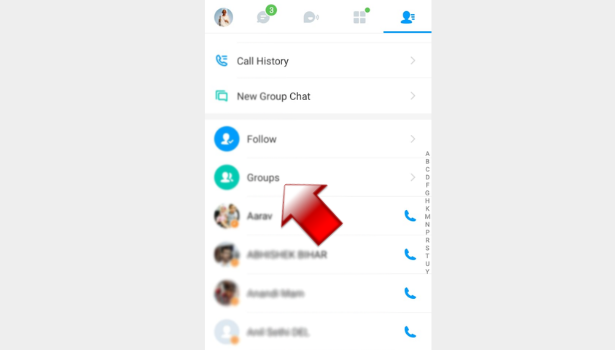
Step 3- Tap on New Group Chat: The imo interface will take you to a new page with a list of all your imo connections on it.
These are people in your contact list who have downloaded the imo app and can text or call you through it.
Above the list of all these contacts, you will find an option to create a new group chat. Click on this option.
Step 4- Select whom you want to add to the group: After you finish the last step, you will be able to see a list of all your imo contacts.
On this page, you can select all the people you want to add in your chat group. This can be done by simply tapping on the names of all those contacts. 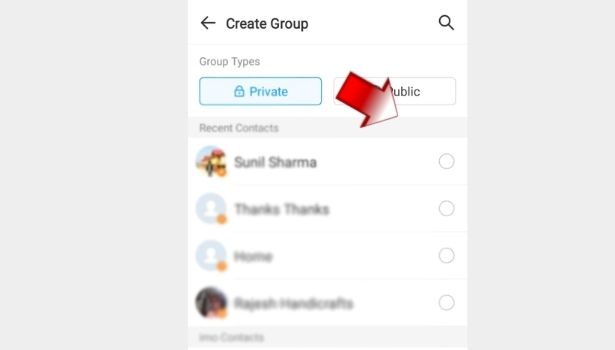
Step 5- Your group is created: You have successfully created an imo chat group. You can check this by tapping on the group option on the contact list page.
Once you have sent a text or a media in the group chat, it will start appearing on the first page of imo app. This page will show the group chat along with all the other chats that you have with your imo contacts.
The chat group feature serves its purpose by allowing the imo users to use the app for having conversations with multiple contacts. You can use this feature to share media files with more than one contact in your contact list.
This can save you the time and effort to send the same message or media again and again to multiple people. By using this tutorial and following all the steps you can use this feature without any trouble. We hope that this guide was able to help you in creating a chat group on the imo app on your mobile.