How to Make Group in Google Sheets
When we say that you can make a group in Google sheets then, it means to group the cells of the sheet into a single cell.
You can perform the merge and the unmerge operations on the cells in Google sheets to group or ungroup them. These are some of the many operations that you can perform on cells. You can also fill color in cells in Google sheets. This article tops about how to make a group in Google sheets in 6 simple steps. This means that it is the grouping process. Let's see what are we trying to imply:
How to Group Rows and Columns in Google Sheets
Make Group in Google Sheets in 6 Steps
Step-1 Open Your Google Spreadsheet: The first step makes you decide from the two given options:
- Whether you want to open a new Google sheet.
- Or, you want to open a spreadsheet that you have already created previously.
In the first case, just search for the link in the given picture in the search bar of a web browser and it will open up.
And, in the second case, you will need the link of that Google sheet that you have to paste in your web browser to search for it.

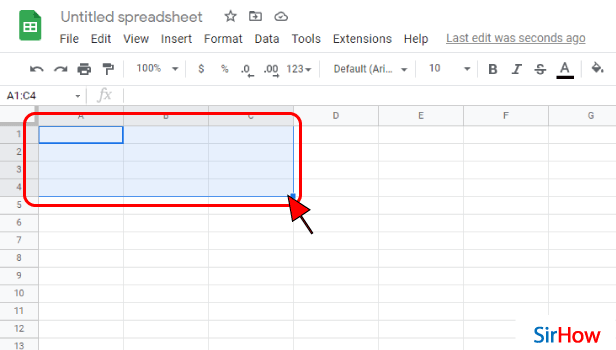
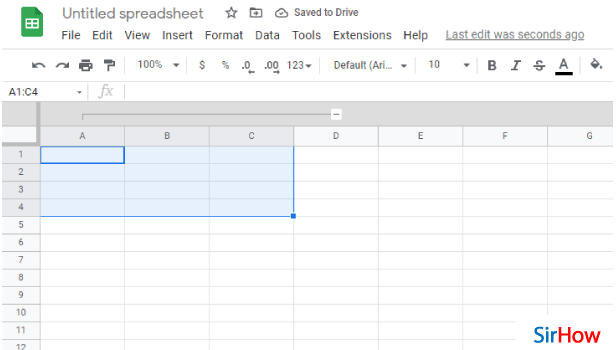
Step-2 Select Cells or Columns you want to Group: Now, you have to select all the cells that you want to group into a single cell.
- Just click on a cell.
- At the same time, press the right-click on your mouse.
- Then, drag the cursor to select all the cells that you want.
- When you are done, you can leave the right of the mouse.
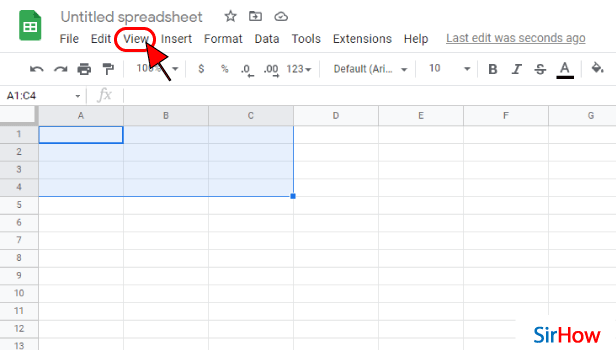
Step-3 Click on 'View': From the very top menu bar of Google sheet, you have to tap on the 'View' option. It is not difficult to find this option. This is placed at the third position from the left.
Step-4 Click on 'Group':
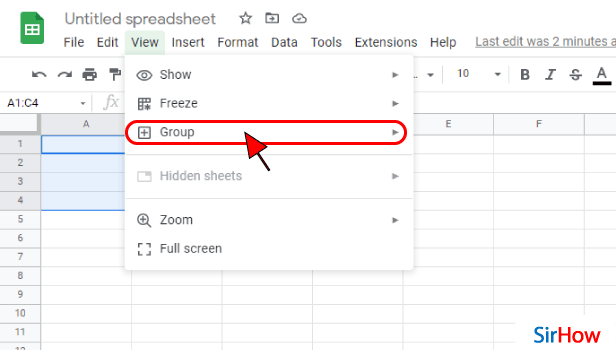
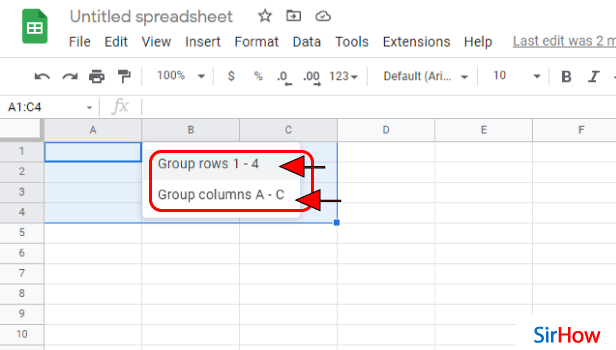
Step-5 Select Group Rows to Group Rows Or Group Columns to Group Columns: Then, from the pop-up message, you have to select the entire number of rows and columns that you want to group.
Depending on the rows and columns that you have selected, you will get two options as you can see in the picture below.
Step-6 Columns Are Now Grouped: When you click on the aforementioned options, you will see that all your cells are grouped including the rows and the columns.
FAQ
How Can I Categorize Data in Google Sheets?
The following steps deal with the ways in which you can categorize your data in Google sheets on your Android device like a mobile phone or tablet.
- On your Android phone or tablet, first you have to open the Google sheet in the Google Sheets app.
- Then, to select a column, tap a letter at the top.
- Then, you need to open the menu for the column, and for that, again click the top of the column.
- Click on the 'More' option.
- Now, scroll down.
- Then, you will find the sort options as follows: SORT A-Z or SORT Z-A.
- Choose any one of the following options and your data will be sorted accordingly.
Can I Reorder the Tabs in Google Sheets?
You can easily order all the tabs in Google sheets as per your choice. You can even create folders of these tabs.
To re-organize or simply reorder tabs in Google Sheets, do the needful:
- Tap or click and drag the tabs to the location that you want them to be.
- Then, just click near the name of the tab.
- Hold your click.
- And then, drag the cursor to the right or the left position.
- After that, release the click of your mouse when the tab is where you want it to be.
How Can I Make a Drop Down List in Google Sheets?
Follow the given steps and you will easily with ability to make a drop-down list in Google sheets:
- Open your Google Sheet.
- Select the cell in which you want to create a drop-down list. You can also select multiple cells.
- Then, click on the tab that says 'Data'.
- Next to 'Criteria', choose 'Option'.
- The cells will now have a Down arrow.
- Finally, click on 'Save'.
You can also change the checkbox color in Google sheets.
Another Method
When working with a large spreadsheet, it can be difficult to see the specific data you need without constant scrolling. In Google Sheets, you can group rows and columns and then expand and contract them according to your need. In Google Sheets, grouping rows or columns entails underlining related rows or columns. It is not required that the data in these rows or columns be similar. Which rows to group are entirely up to you.
In this article, we will look at the ways you can make Group in Google sheets.
Make Group in Google Sheets: 3 Steps
Step 1 - Open the google sheets app: Google sheets is a spreadsheet application that is part of Google's Drive online storage. In order to make a group in Google Sheets, you will have to open up the application. Its symbol is a simple green paper. Over the paper, there is a square box that divides the logo into four cells.
- It is easy to spot. And if you do not have the application on your device, go to the play store and type in the search bar 'google sheet'.
- Look for the said logo and download it. After you install the app on your device, follow the steps mentioned below.

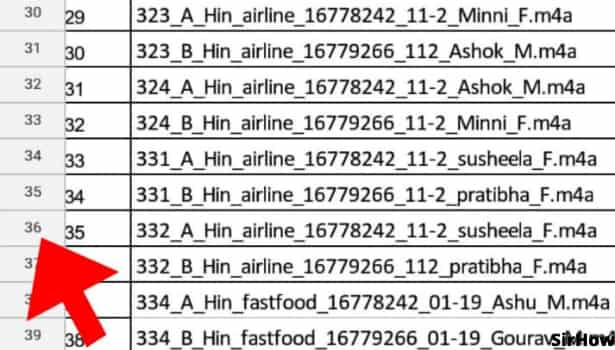
Step 2 -Click on any number row: So you have opened the Google sheets app on your device and now are on the sheet you want to group two or more rows/columns that you want to group as the data might be similar or it makes sense if the rows/columns selected are in group.
- Select all the rows/columns you want to make group of by clicking on them.
- You can also select them by holding onto the Ctrl key while clicking on the rows/columns you want to group together.
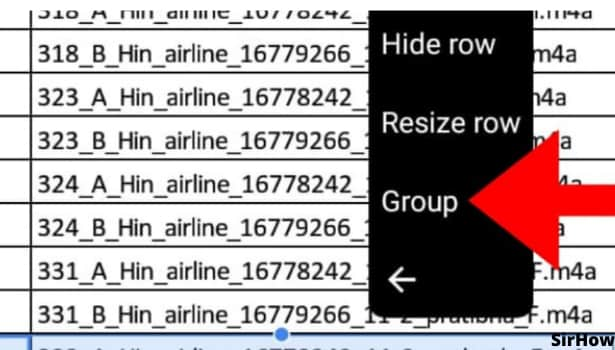
Step 3 - Click on group to make a group in google sheets: After selecting all the rows/columns you want to group, Right-click to open a drop-down menu, you will find many options for example "Resize Row" which you can use to resize the selected rows so as to fit the text in them.
- Also, there is an option to "Hide" the selected rows, which you can click if you don't want to see the particular rows as the data might not be required.
- Also in the options, you will find the "Group" Options which you will have to select to group all the rows/columns you have selected.
- tap on the Group option to group the rows.
Conclusion
When there is a lot of data that are related or similar, it is helpful to group rows. It lets you expand the data as needed while keeping it closed at other times. As a result, the spreadsheet is small, simple to use, and appealing to the eye.
Any spreadsheet's data can grow exceedingly vast over time. As a result, you may need to Group two or more rows or columns to make working with them easier. When you've finished utilizing the groups you created to help you see your data more clearly, you can easily ungroup the rows or columns by repeating the same procedures.
You should now be able to easily group and ungroup rows in Google Sheets. Hopefully, this will assist you in more effectively organizing your data.