How to Stop Your System From Sleeping on Windows 11
Continuity is the key factor for consistent brilliance in your work. While working on the system of windows 11 may bother you, due to the time and again screen shut down. It is annoying as well as breaks the speed and dedication towards your work project. It is relevant to stop your system from sleeping on windows 11, to avoid interruptions and work consistently. Hence, watch out for the below steps by steps guide to accomplishing sleeping mode on your system. Let's get started!
Stop Your System From Sleeping on Windows 11 With 7 Easy Steps
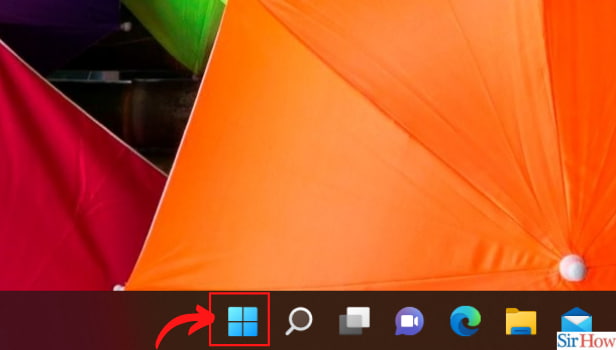
Step-1 Click on the Windows Icon: Your Pc must be fully active to make the system refrain from sleeping.
- Now after you open the Pc.
- Then go to the windows icon on the taskbar.
- Next tap on it.
- Now open Windows 11.
- Also, make sure to track internet usage in windows 11 to avoid excess use of the internet.
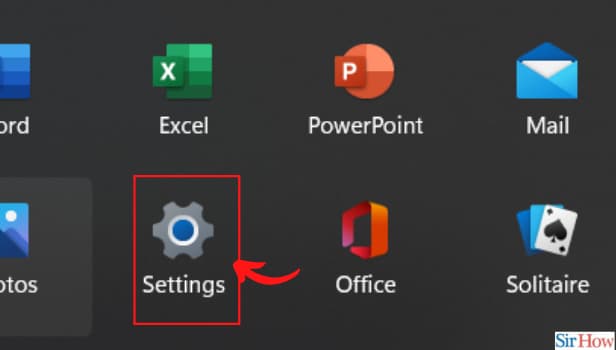
Step-2 Choose the ‘Settings’ Option: Now once the app options list appears on your screen. Go to the settings option. Then tap on it to open settings. Or else use the “Win+I” shortcut to open the settings option.
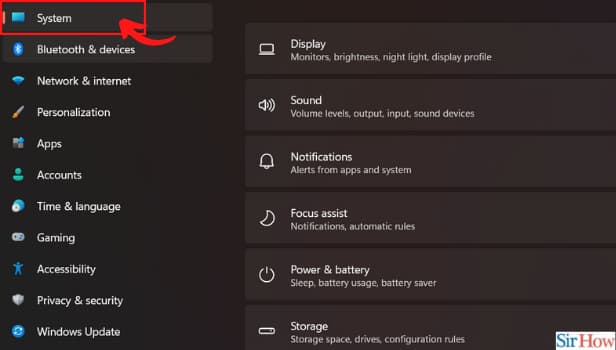
Step-3 Go to the System Section: Under the settings option, go to the system section from the left sidebar.
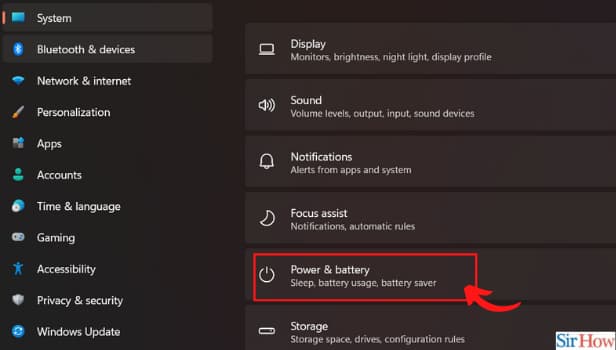
Step-4 Select Power & Battery Option: Under the system section, you will find another list of options. Now go to the power & battery option. Then tap on it and open it.
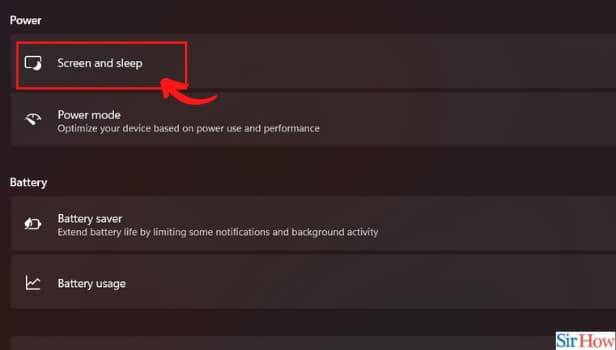
Step-5 Click on the Screen and Sleep: The Power & Battery option opens another different options list. Now tap on the Screen and Sleep option to expand it.
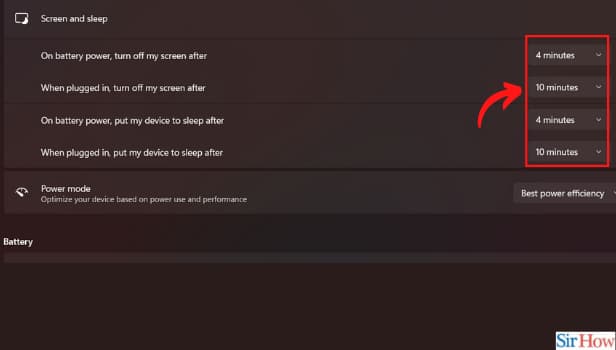
Step-6 Click on Each Option: The Screen and sleep option will open a drop-down menu under it with several different options. You have to click on each option of them.
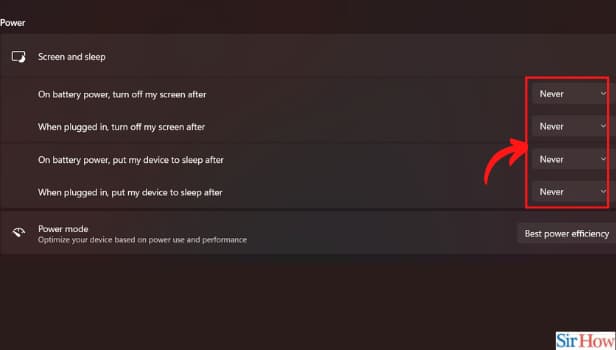
Step-7 Change All the Time To Never: Once you tap on each option, you will see never an option. Change the option from all-time to never in each option. Now your system will never sleep and work continuously.
How To Know The Battery Usage Of Windows 11?
To begin with, open the windows icon. Next tap on the settings app from the various app options of Windows 11. Now go to the systems section. Next, tap on the Power & Battery option. Now you will find multiple options under it. You can see battery usage there. Click on it. Then you can view your battery usage of Windows 11.
How Can You Save Battery On Windows 11?
You can save battery usage by turning off some notifications from specific applications on Windows 11. Moreover, you can stop the background activity from certain apps. Also, you can disable the wifi in Windows 11. This will reduce the usage of the battery. Hence you will save the battery on windows 11 for later use.
After Making Your System Of Windows 11 On Sleep Mode, Can You Get Back to The Older Settings of it?
When you don't want any interruption, then putting the system to sleep is the best thing to do on Windows 11. However, you can get back to the older settings whenever you feel like doing so. Follow the above steps. Just choose the time option instead of Never. That's it.